How and When to Replace Your Brake Pads
We all like to know how quick our ATVs or Side-by-Sides (SxS) are, and how fast we can accelerate, but slowing the machine down is more important. For this task, we all need to be very aware of our braking systems. Modern ATVs and SxS vehicles all come with disc brakes, and taking care of our braking systems is vitally important. Most of the time, the biggest maintenance thing to care for with disc brakes is knowing how and when to replace your brake pads. Don’t worry too much about this, as it is a relatively easy task, and one you likely won’t have to do that often.
ATV.com thanks Yamaha for sponsoring this New Rider series.
The Fundamentals of Disc Brakes
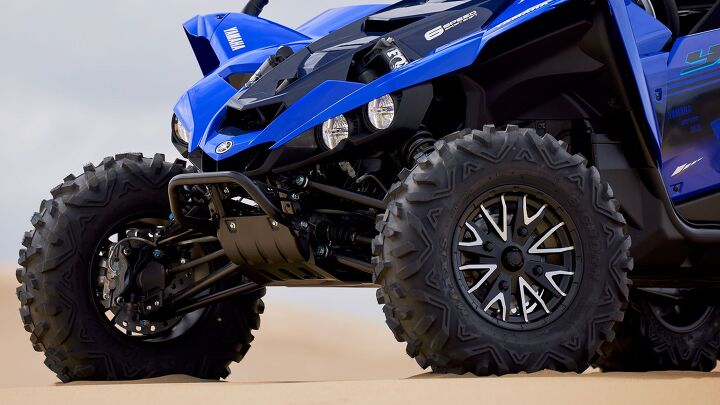
Most of us understand the basics of disc brakes, but for those that don’t, let’s take a moment to cover the basics. A disc brake system consists of a metal disc rotor that rotates with the wheel when your ATV or SxS is in motion. When you apply the brakes, a caliper that covers a portion of the disc compresses the brake pads, on either side of the rotor, pinching it between the two pads. The caliper uses hydraulics to compress the pads against the rotor with pistons. The friction and pressure created from this action slows down the brake rotor and the machine. The act of using the brakes causes heat from the friction, which is part of the reason why brake rotors are often vented with holes to aid in cooling. The other reason is to allow the rotor to clean itself. The brake pad material is a form of fiber matter that is bonded to a metal plate. These plates attach to the caliper and press the fiber matter against the rotor. The fiber wears down due to being in contact with the rotor, hence the need to occasionally replace the pads. Sound confusing? It’s not as complicated as it might seem.
How Do I Know When it’s Time to Switch Out the Brake Pads?
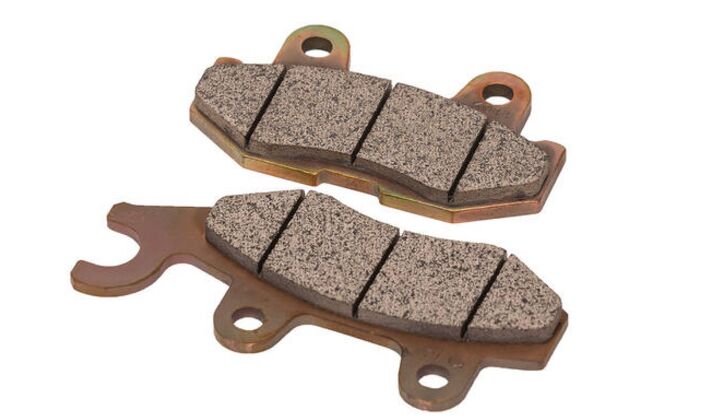
You should routinely check your brake pads for wear. As we mentioned, the pad is a metal plate with a fiber material attached. The fiber material should be worn evenly. If one side is thicker than the other, there is an issue with your caliper, meaning it is pressing one side more than the other. If the pad is worn evenly, then the brakes are working as they should. If the fiber material is almost gone, it is time to replace the pad.
If you listen when you apply the brakes, a squeaking brake can indicate that the brake pad is worn down. Metal upon metal in the brake system is not a good thing. Also, grinding noises can indicate that the brake pad material is worn and needs to be replaced.
How Do I Replace My Own Brake Pads?
Replacing your own brake pads isn’t that hard and can be done rather quickly – most of the time. Start out by buying the correct replacement brake pads. There are some aftermarket pads that will work, but for the best results, we suggest using replacement OEM pads. This way you can be sure of an exact fit. For instance, if you're an owner of a Yamaha YXZ1000R SxS, opting for Yamaha Genuine brake pads ensures optimal fitment and extended durability. Loosen your lug nuts and then jack up the wheel for the brake you are replacing first. Once you have the side off the ground, and supported with a jack stand, finish taking the tire and wheel off.
The next step is to remove the caliper mounting bolts. These are behind the rotor and hold the caliper in the bracket. You will then remove the caliper from the bracket that holds it in place. This may require a little extra effort, as sometimes they don’t want to budge. A pry bar can be used to gain some leverage to pry the caliper loose. A rubber mallet can add some percussive force, too. Just don’t go crazy whacking on the caliper.
This is a good time to inspect the caliper and be sure that the brake pads are moving freely. If everything looks OK, the next step in changing your own brake pads is to remove the caliper pins that hold the pads in place. These will be located along the bottom of the pad area on the caliper. Depending upon the exact model, you may not need to remove the pins, but instead find a brake pad slide bolt that is removed instead. Either way, once either the slide bolt or the pins are removed, the pads should come out, starting with the outermost pad.
With the pads out, clean the caliper to remove any residue from the caliper. You don’t want to use an overlay harsh cleaner, and make sure you give everything a good wipe down before you start replacing things. Be sure to thoroughly clean the rotor, too. We suggest a contact cleaner and a wipe down with a soft cloth to remove any metallic residue left from the old brake pads.
New Pad Time!
Installing the new pads is fairly easy. The process of taking the old pads out is essentially just reversed, with new, fresh brake pads going in. Everything should slide back together with ease and once the new inner and outer pad are in place, you can reinstall the clips or the caliper slide bolt.
With the pads in place, reinstall the brake caliper over the rotor and hand tighten the caliper mounting bolts. This is when you need to spin the rotor assembly to be sure that the brake pads are not in contact with the rotor when the brakes are not being applied. Since ATV and SxS brakes are hydraulic, this shouldn’t be the case, but if there is contact, you might have a piston sticking. If this is the case, remove the caliper again, and the pads, and then work the brake pistons with your fingers. They should be even. If they are not, then you may have to bleed the brake lines. This will require some time and works best to have an extra set of hands; one to operate the brakes and one to work the bleed valve on the brake line.
If there is no contact with the rotor, and there likely won’t be, then torque the caliper bolts to the proper specification and replace the wheel. Repeat this process for every brake caliper and you are then good to go. It is a good idea to replace the brake pads for every caliper all at the same time. It just makes for a smoother operating machine and saves you the trouble of any mechanical issues from the brake system when you’re on the trail.
Check out the New Riders Hub for more articles geared towards new off-road enthusiasts.
Derrek's love for all things ATV started when he was a mere 11 years old, growing up on his family farm. His mom gave him and his sister a choice - get a horse, or a three-wheeler. The sister wanted the horse, and Derrek wanted the ATV. Luckily he won out, and was soon burning up the trails on a Yamaha Tri-Moto 200. By the time he was 14, he had saved enough of his own money by working on the farm and in his folks restaurant to buy a new 4-wheeler. That happened the day he and his mom were driving past the dealership and saw 1987 Banshee. His mom had no idea what he was buying, and he never looked back. He's been riding ever since, and been writing professionally for many years. He has ridden all over North America and been behind the controls of just about every machine out there. And yes, he still has his 1987 Yamaha Banshee.
More by Derrek Sigler


![Don't Try This at Home: Muddy Crash [video]](https://cdn-fastly.atv.com/media/2022/10/24/8744120/don-t-try-this-at-home-muddy-crash-video.jpg?size=350x220)